USB Firmware Compilation
Start Compilation
- You need an upper computer with the
klipperservice installed Connect via SSH over the network - And make sure the device is connected to the upper computer
- Note: Please use a regular upper computer, such as a Raspberry Pi FLY board, etc. If you are using a modified upper computer, we cannot provide much assistance due to too many issues.
- Do not use the
ROOTuser
- 请确保上位机可以正常联网
- 固件编译前需要使用SSH通过网络登录上位机
- 请不要使用串口工具登录上位机
Klipper固件编译和配置页面操作说明
请确保键盘输入法为半角模式,即英文模式
- 键盘上键
↑,下键↓,用于上下移动光标来选中菜单项 - 确认键
Enter或 空格键Space,用于勾选菜单或进入子菜单 - 退出键
ESC,用于返回上一级菜单 Q键,用于退出Klipper固件配置页面Y键,在退出Klipper固件配置页面时,如果有提示,则点击Y键保存配置文件
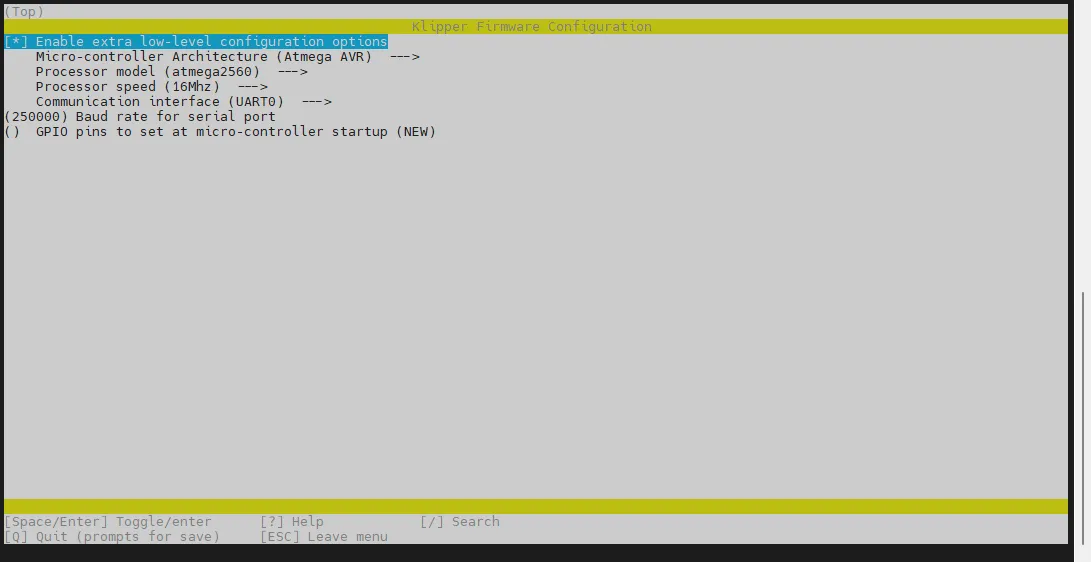
如果配置页面选项比较少,请先勾选[ ] Enable extra low-level configuration options,用于显示部分隐藏选项
Below is an introduction on how to compile the firmware:
-
After connecting to SSH, enter the command below and press Enter:
cd ~/klipper && rm -rf ~/klipper/.config && rm -rf ~/klipper/out && make menuconfig -
Among them,
rm -rf ~/klipper/.config && rm -rf ~/klipper/outis to delete previous compilation data and firmware, andmake menuconfigis to compile the firmware. After execution, the following interface should appear: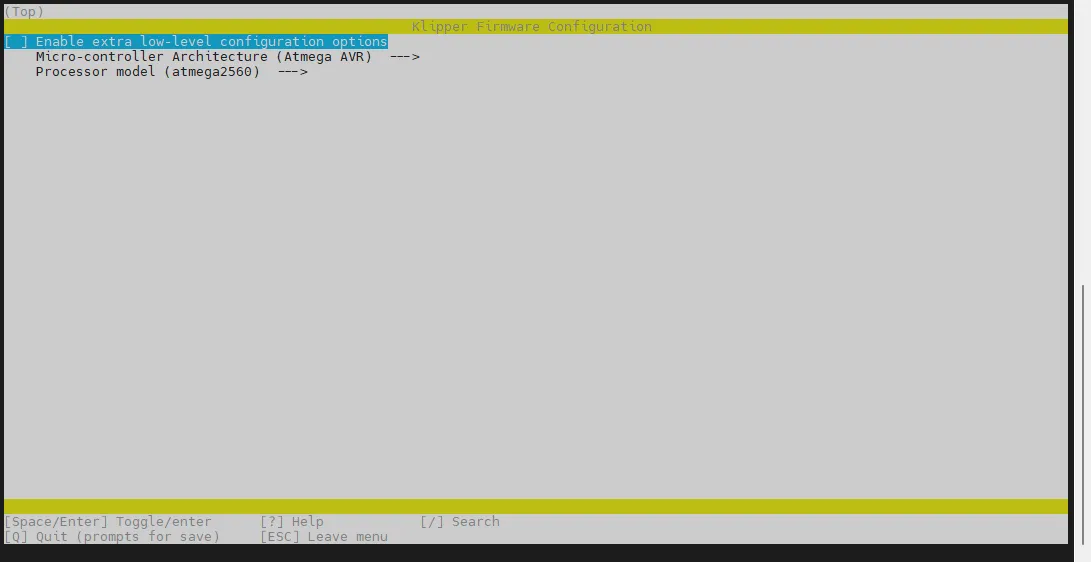
-
Select Enable extra low-level configuration options and press Enter
-
Enter the menu Micro-controller Architecture and then select STMicroelectronics STM32 and press Enter
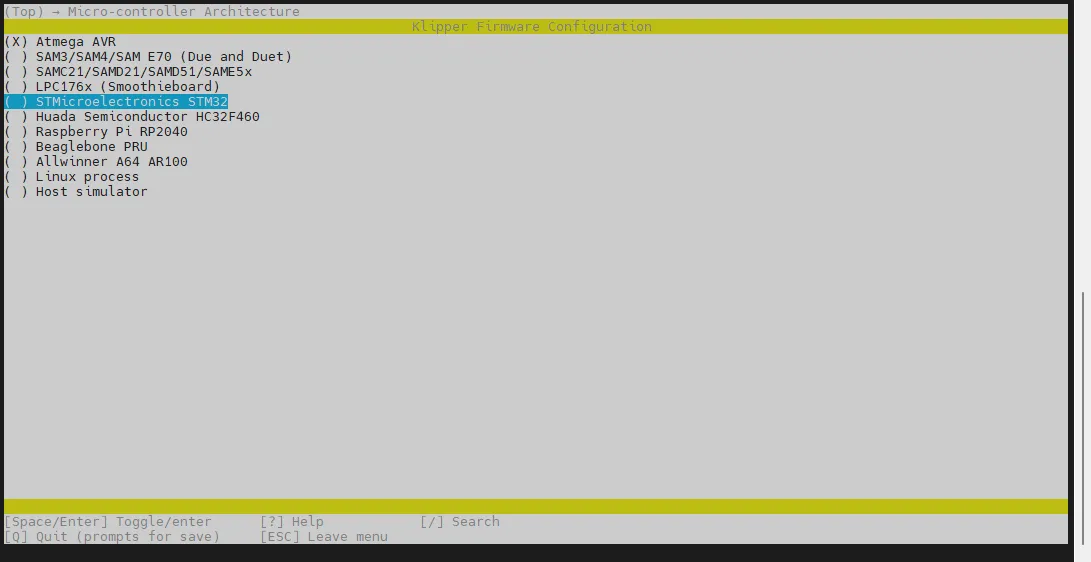
-
Enter the menu Processor model, select STM32F407 and press Enter
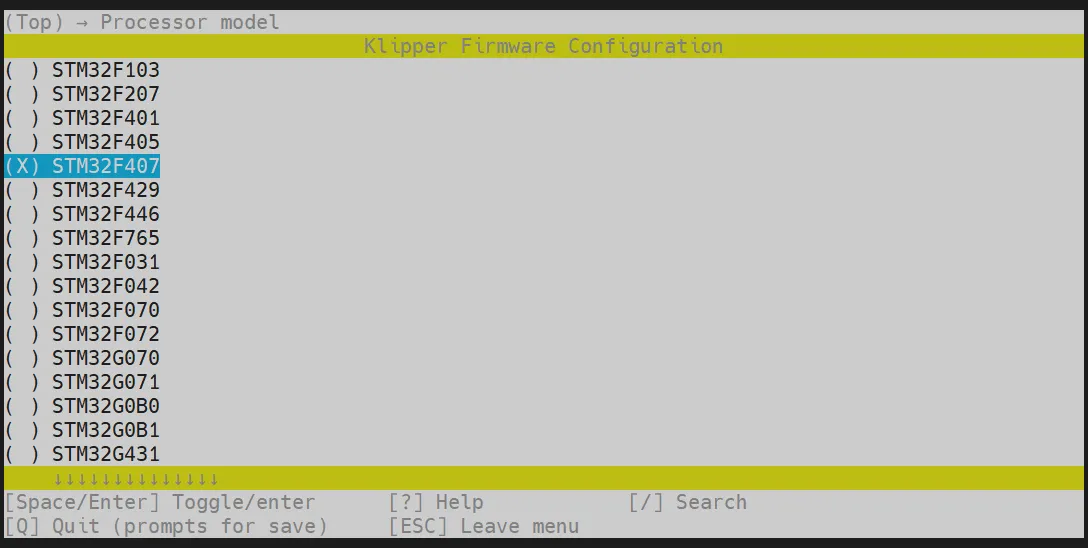
-
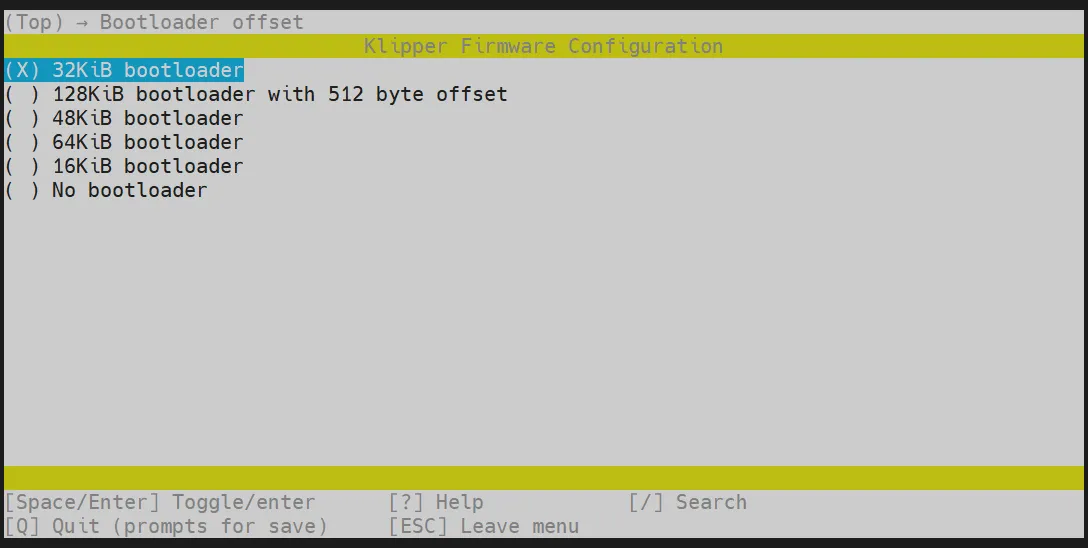
Select Bootloader offset, choose: 32KiB bootloader
-
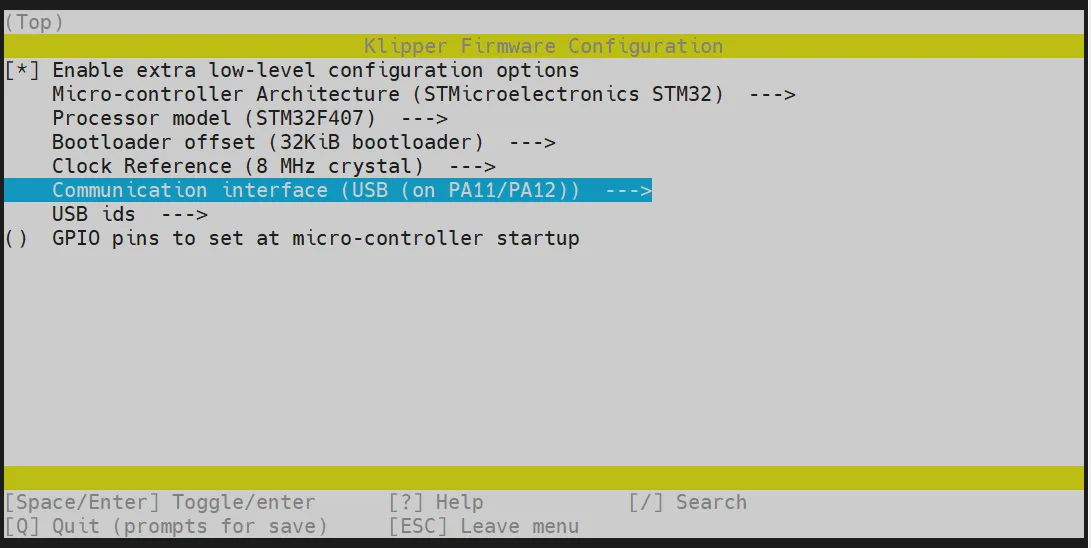
For Communication interface, choose: USB (on PA11/PA12)
-
Press the
Qkey, and when Save configuration appears, press theYkey again.
-
You should now have saved the configuration and exited to the command line interface.
-
Enter
make -j4to start compiling; this will take some time.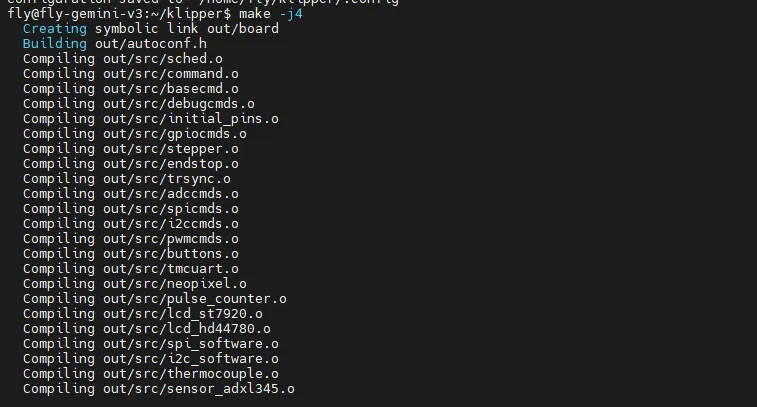
-
When you see the following output, the compilation is successful.
Linking out/klipper.elf
Creating hex file out/klipper.bin
Firmware Flashing
Run the following command to flash the firmware.
sudo fly-flash -d c8 -h -f ~/klipper/out/klipper.bin