USB Bridge CAN Firmware Flashing
Start Compilation
- You need an upper computer with the
klipperservice installed Connect via SSH over the network - And make sure the device is connected to the upper computer
- Note: Please use a regular upper computer, such as a Raspberry Pi FLY board, etc. If you are using a modified upper computer, we cannot provide much assistance due to too many issues.
- Do not use the
ROOTuser
- 请确保上位机可以正常联网
- 固件编译前需要使用SSH通过网络登录上位机
- 请不要使用串口工具登录上位机
Klipper固件编译和配置页面操作说明
请确保键盘输入法为半角模式,即英文模式
- 键盘上键
↑,下键↓,用于上下移动光标来选中菜单项 - 确认键
Enter或 空格键Space,用于勾选菜单或进入子菜单 - 退出键
ESC,用于返回上一级菜单 Q键,用于退出Klipper固件配置页面Y键,在退出Klipper固件配置页面时,如果有提示,则点击Y键保存配置文件
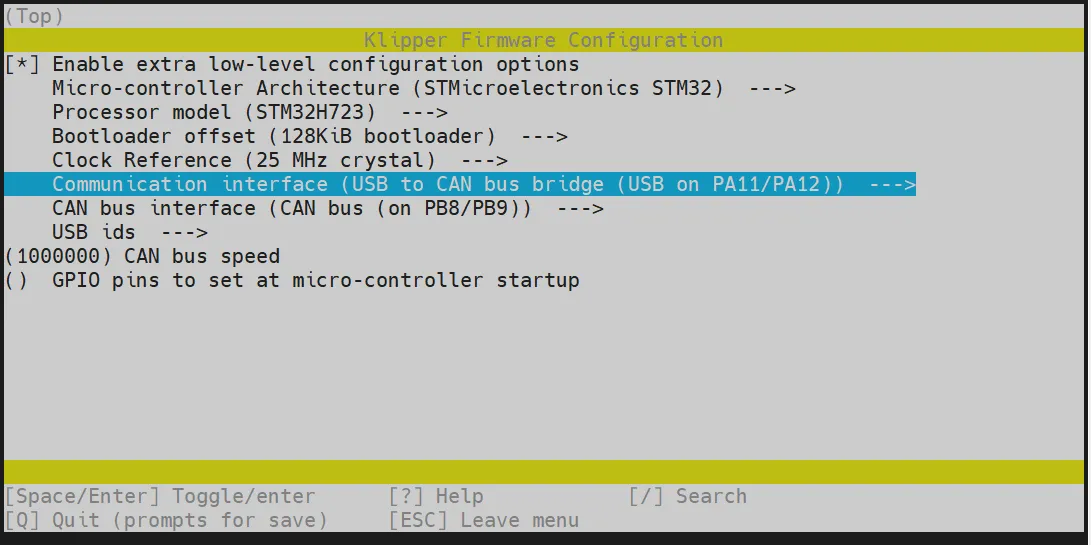
如果配置页面选项比较少,请先勾选[ ] Enable extra low-level configuration options,用于显示部分隐藏选项
Here's how to compile the firmware:
-
After connecting to SSH, enter the following command and press Enter:
cd ~/klipper && rm -rf ~/klipper/.config && rm -rf ~/klipper/out && make menuconfig -
In this,
rm -rf ~/klipper/.config && rm -rf ~/klipper/outdeletes previous compile data and firmware,make menuconfigcompiles the firmware. After execution, the interface below should appear: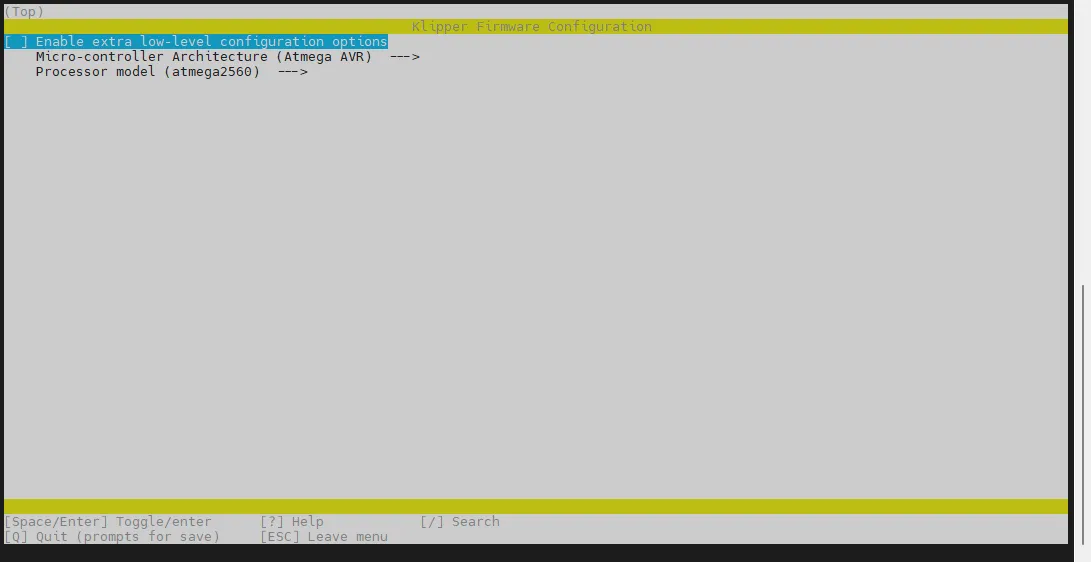
-
Select Enable extra low-level configuration options and press Enter:
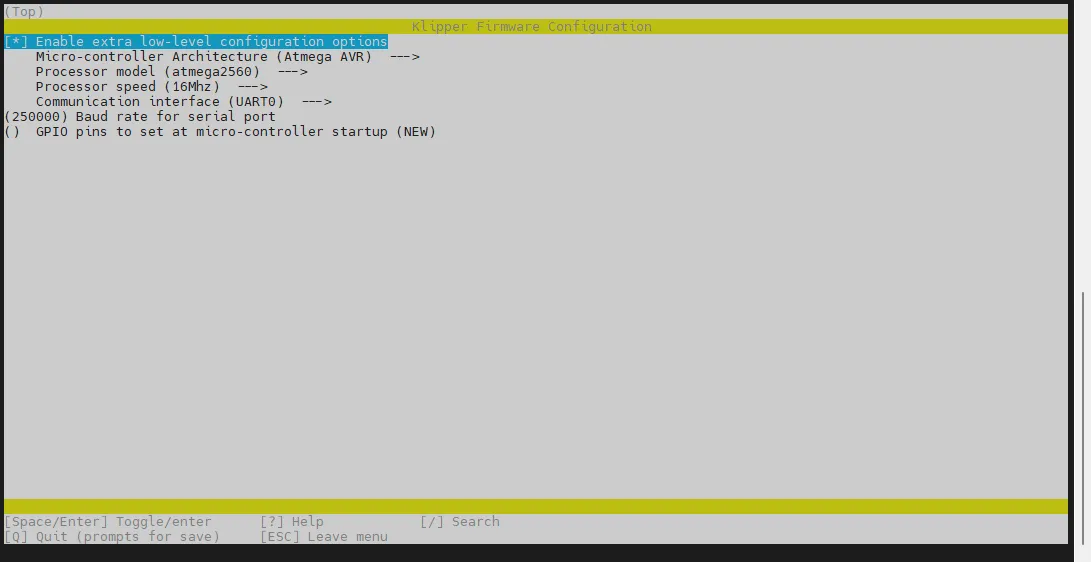
-
Enter the menu Micro-controller Architecture then select STMicroelectronics STM32 and press Enter:
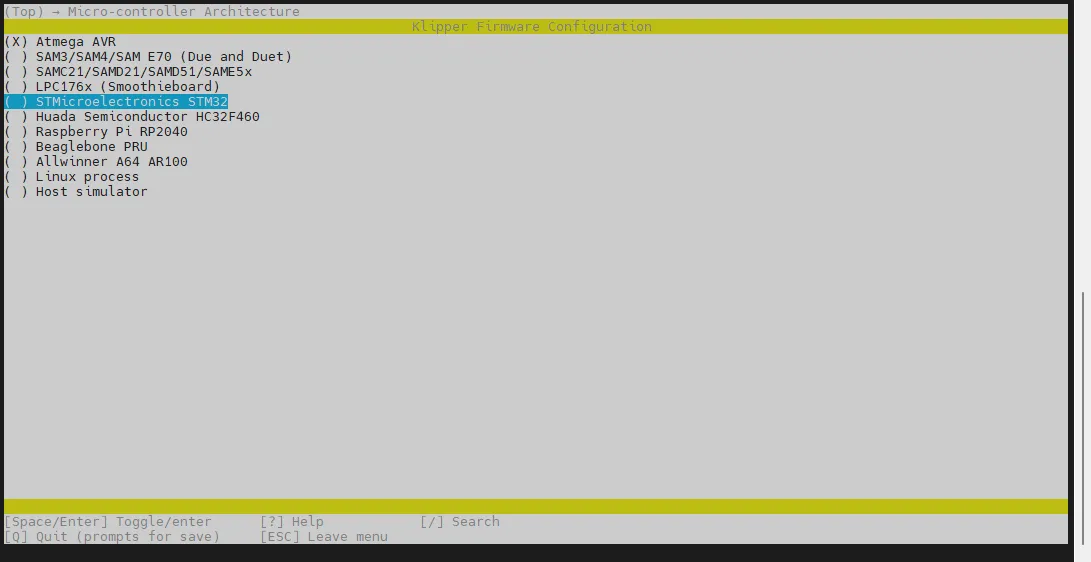
-
Enter the menu Processor model, select STM32H723 and press Enter:
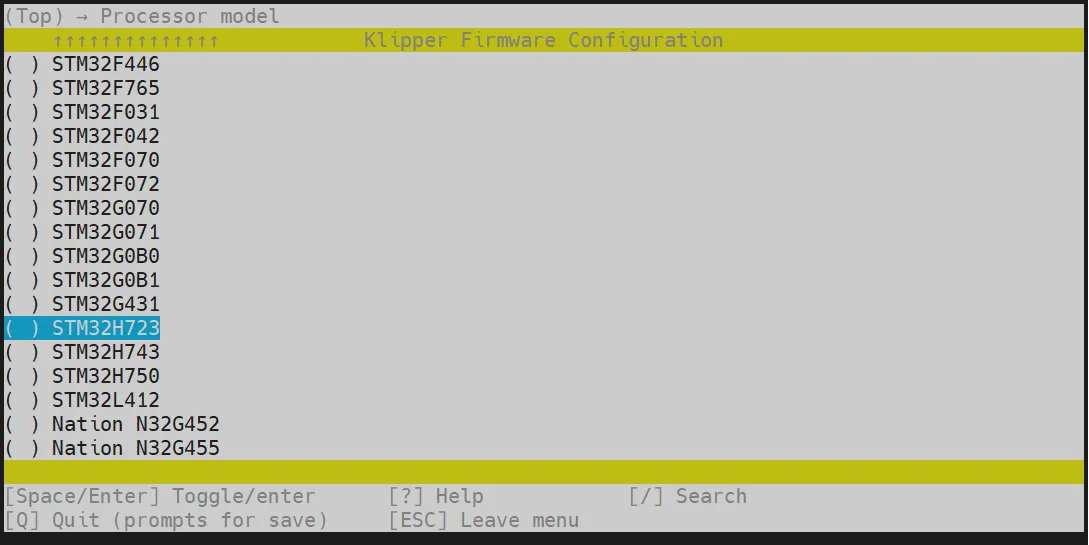
-
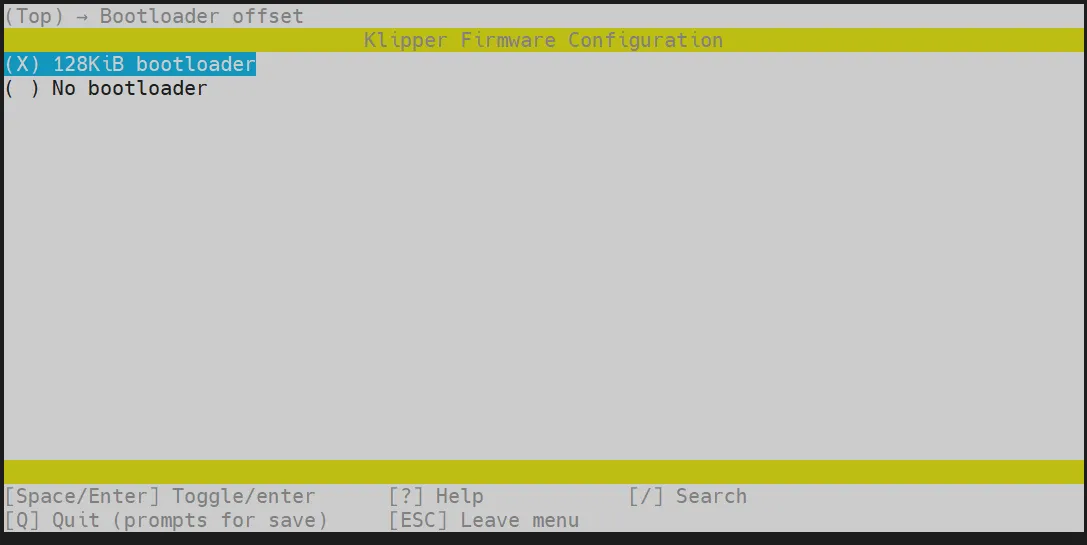
Select Bootloader offset, choose: 128KiB bootloader
-
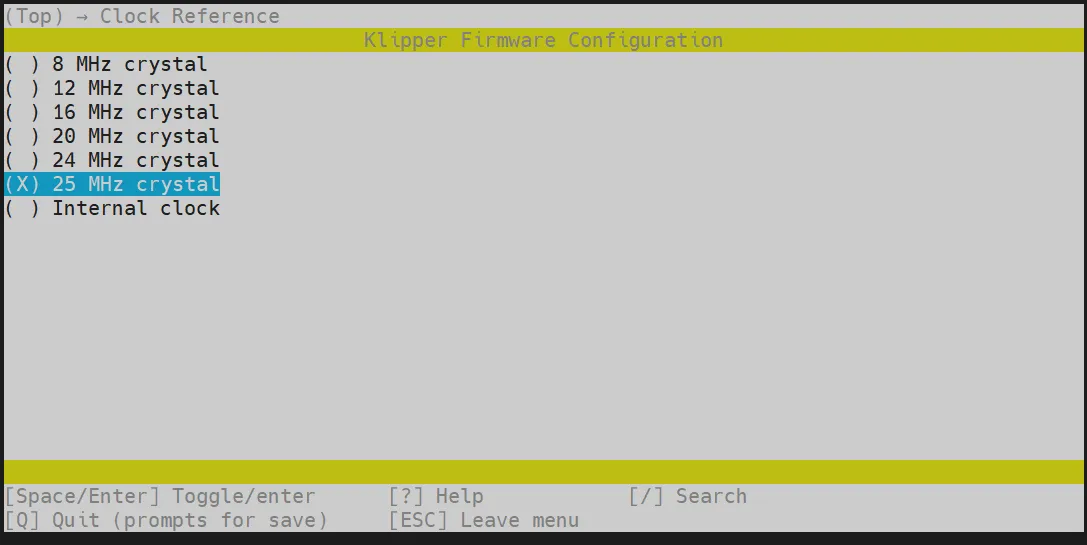
Select Clock Reference (8 MHz crystal), choose: 25 MHz crystal
-
Select Communication interface, choose: USB to CAN bus bridge (USB on PA11/PA12)
-
Press the
Qkey, then Save configuration appears, press theYkey at this time
-
Now the configuration should be saved and you should exit to the command line interface
-
Enter
make -j4to start compiling, it takes some time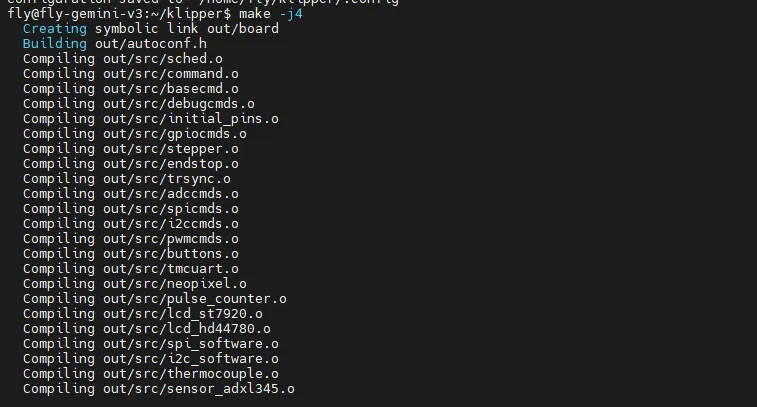
-
If the following content is output at the end, the compilation is successful
Linking out/klipper.elf
Creating hex file out/klipper.bin
Flash Firmware
Preparation
- Before flashing the firmware, please first connect via SSH using the network
- Counterfeit memory cards may cause flashing failure, please try to use the recommended memory cards below for firmware update
- Prepare a TF card with a capacity not exceeding
32G, and it is recommended that the transfer speed of the TF card must beclass10or higher, it is suggested to use brands like SanDisk for the TF card
Download Firmware
- Use the prepared TF card
- Format using
SDFormatter
- Use MobaXterm_Personal to navigate to the file directory on the left side, find
klipper, then openout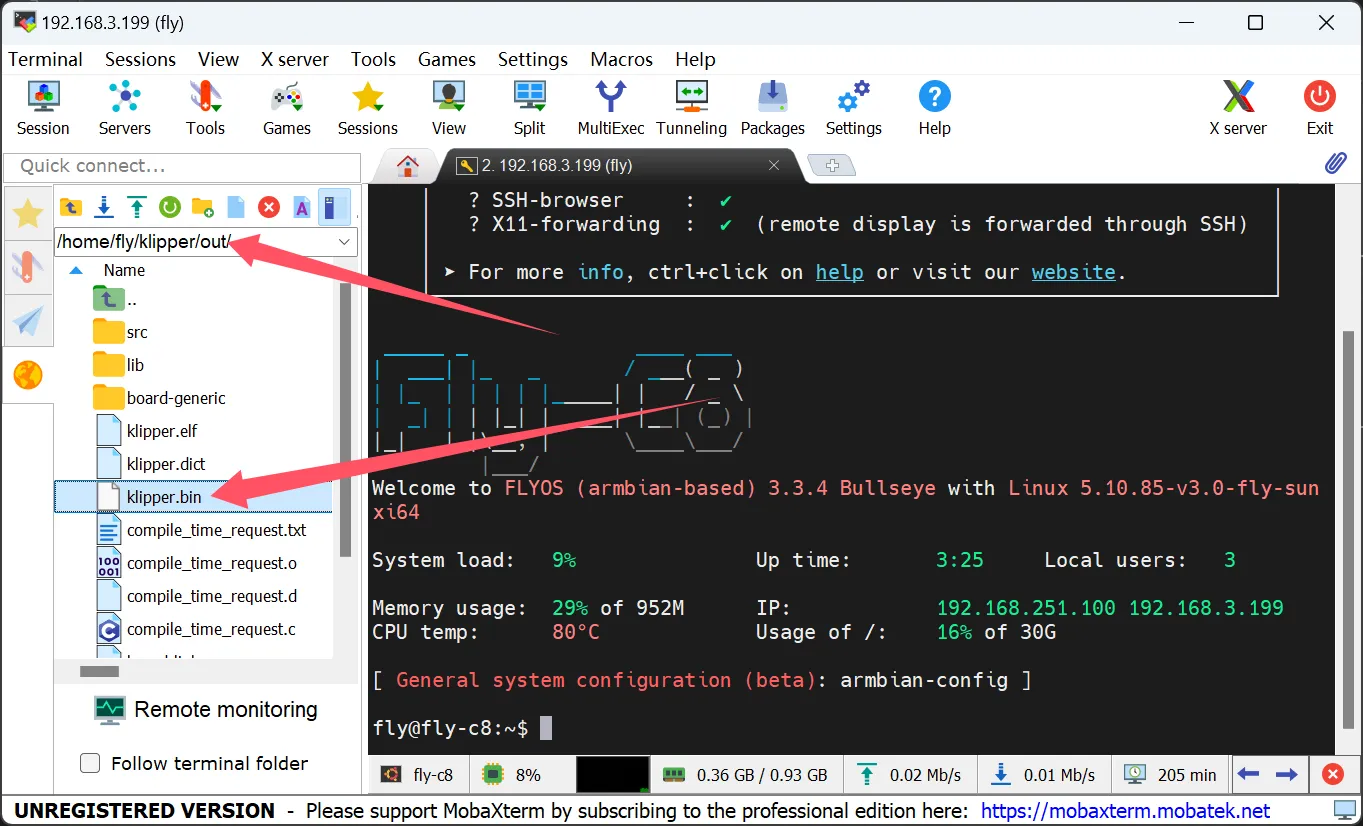
- Download
klipper.binto the TF card and rename it tofirmware.bin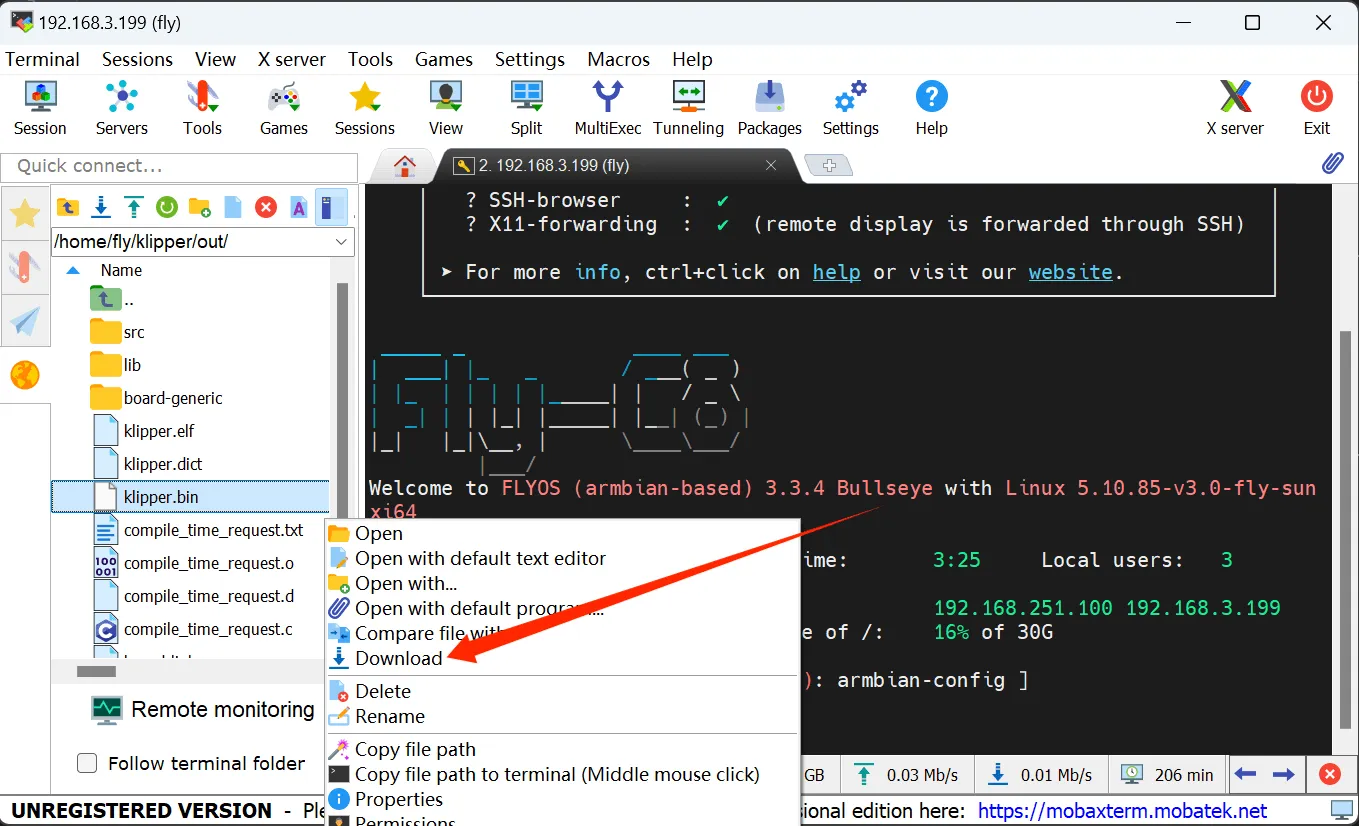
- Power off the motherboard, insert the TF card into the motherboard
- On the motherboard, wait for 10 seconds
- Remove the TF card and insert it back into the computer. If the
firmware.binin the SD card disappears andFLY.CURappears, the flashing is successful.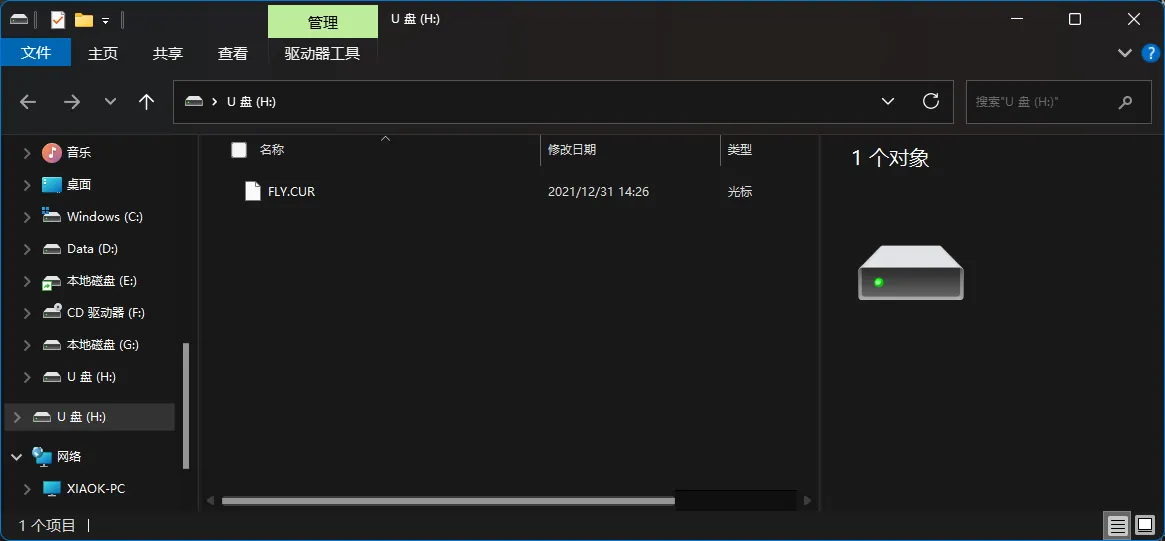
Flash Firmware 2
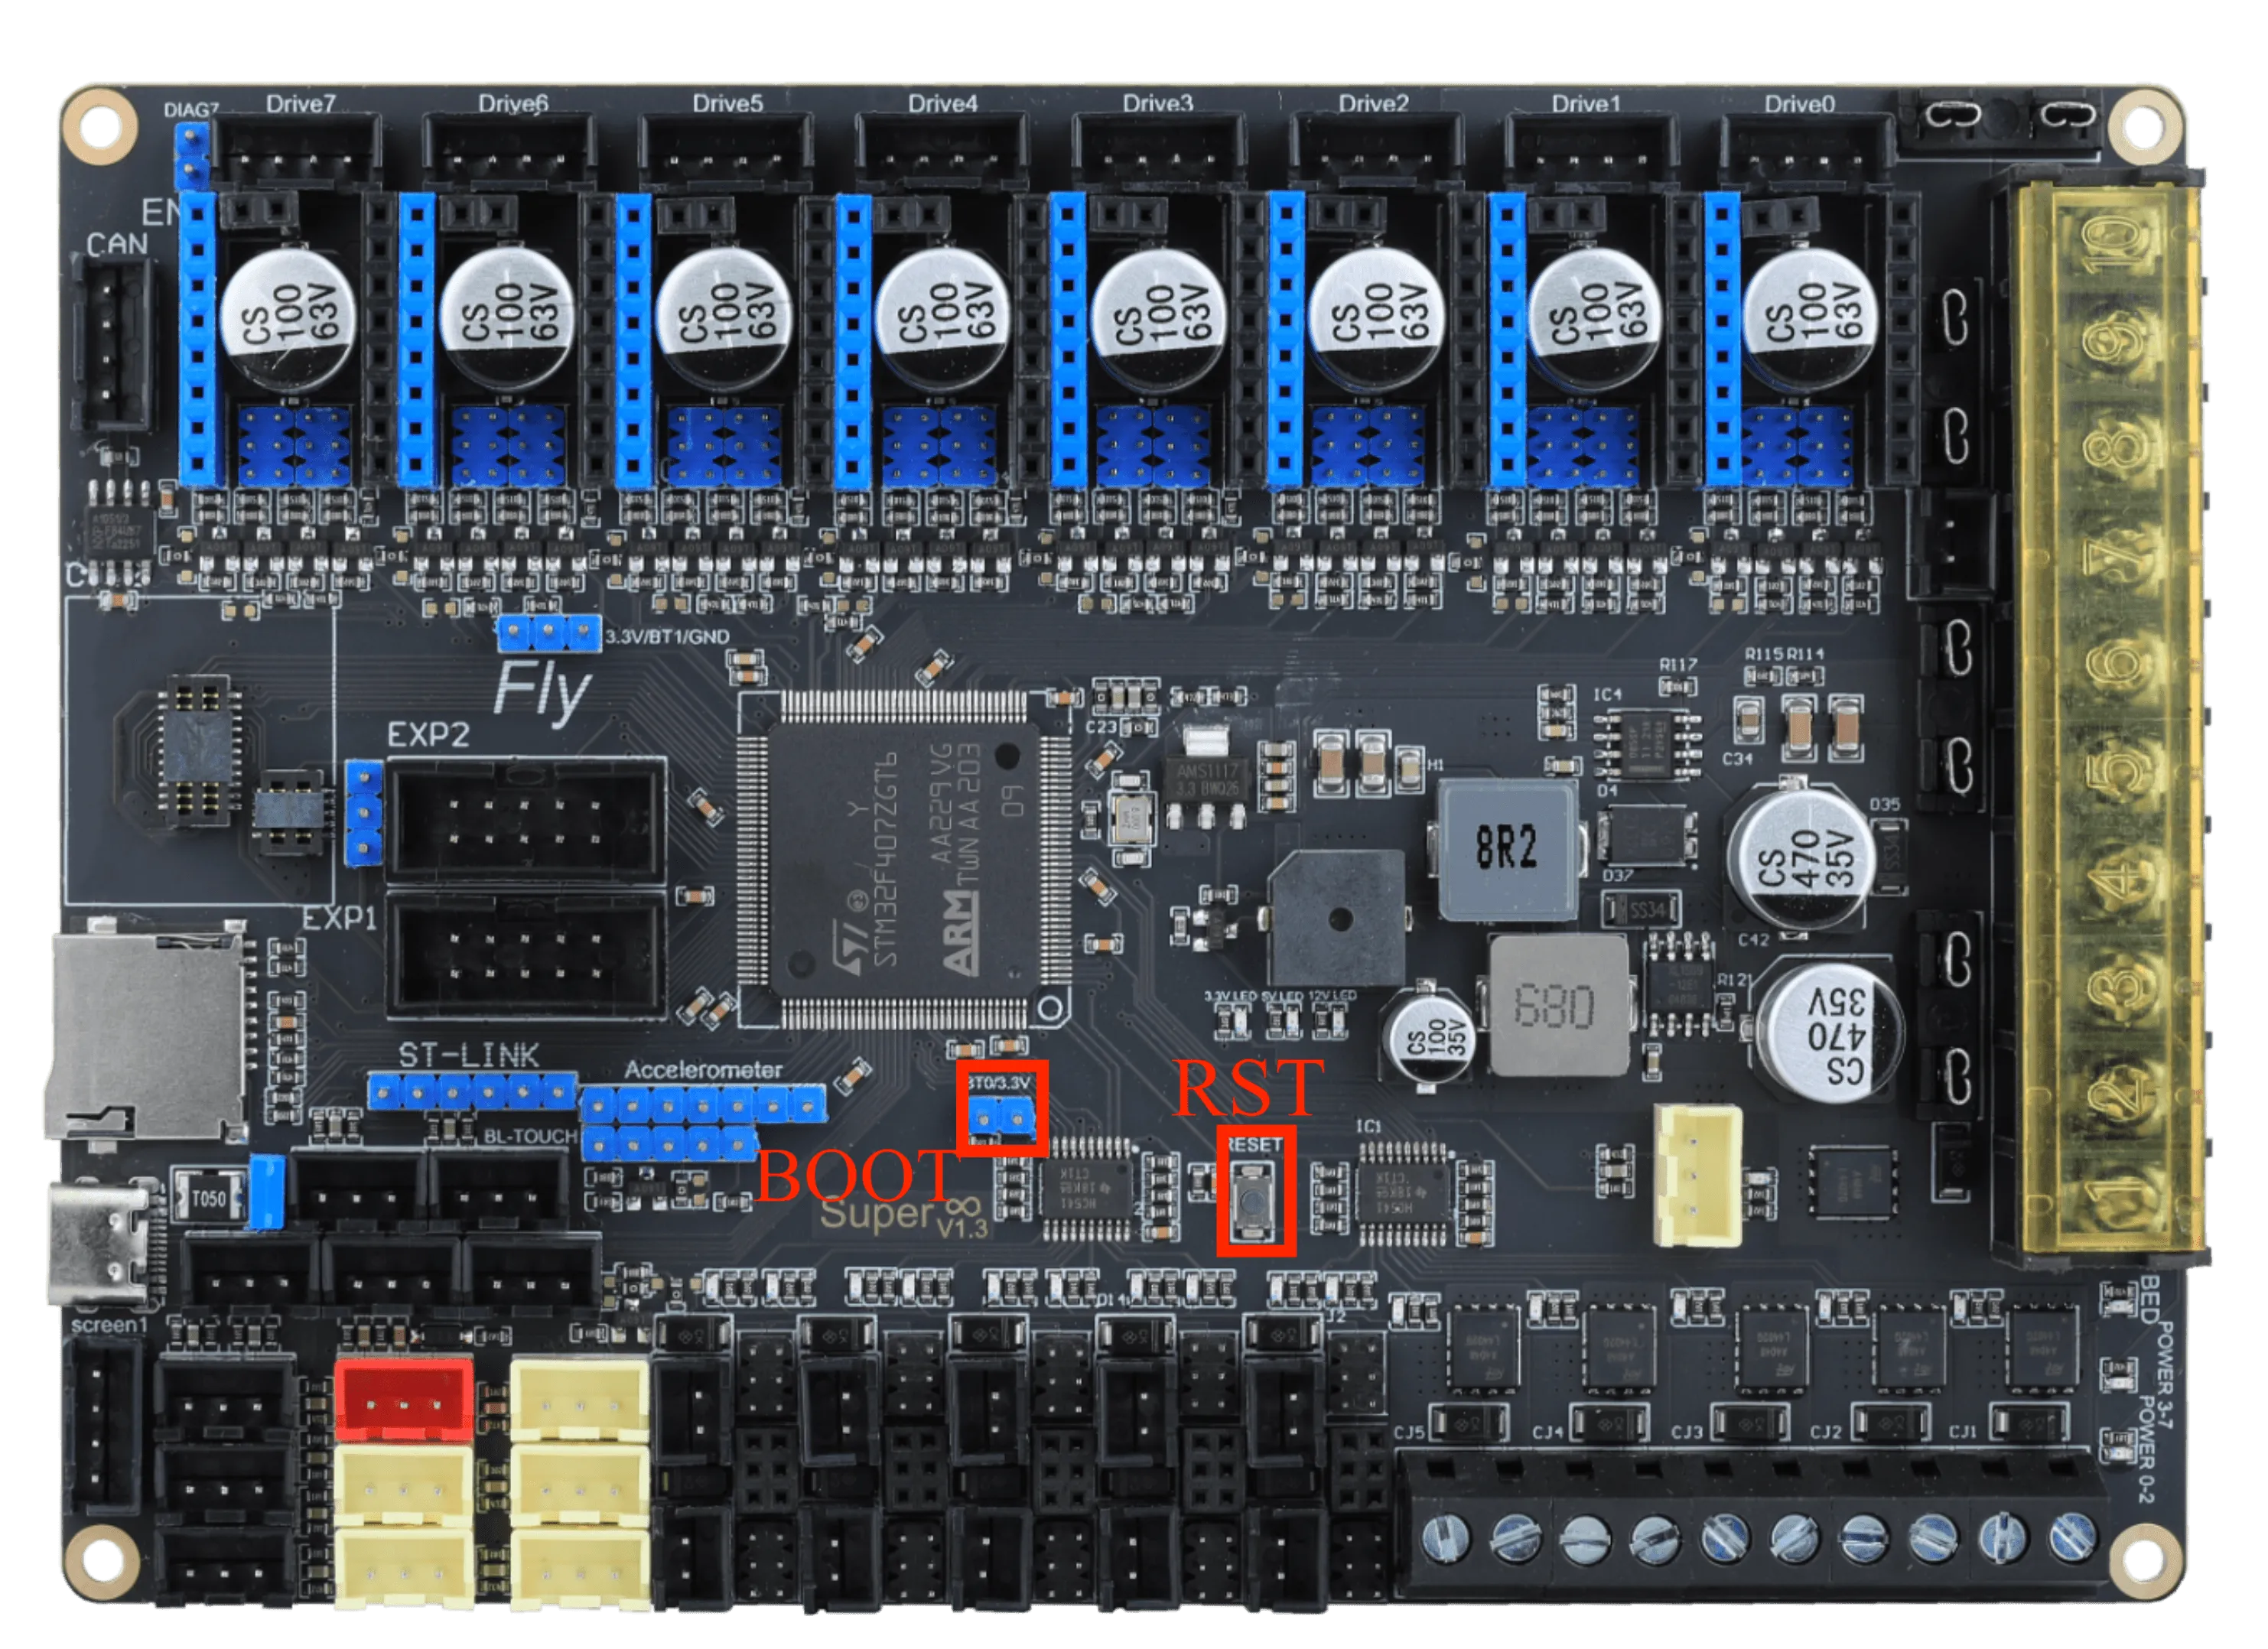
- DFU Flashing
- Follow the picture below to plug in the jumper cap
boot1and then pressrstto restart the motherboard
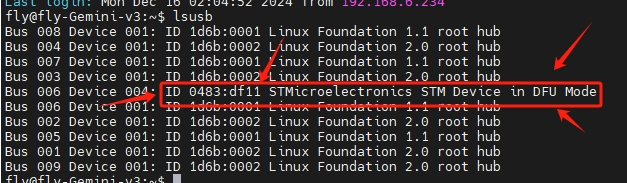
- Enter the following command to check if the motherboard has entered DFU mode
lsusb
- After entering and pressing
Enter, it will output the content shown in the picture below. The content in the picture indicates that the motherboard has successfully entered DFU mode
- Flash Firmware
- Here is the DFU flashing command
cd ~/klippermake flash FLASH_DEVICE=0483:df11
- If the content shown by the arrow below appears, File downloaded successfully, then the flashing is successful
Ignore the error message following the line indicated by the red arrow!!!

After flashing is complete, remove the motherboard jumper cap and press the rst button to restart the motherboard